2011년 8월 19일 금요일

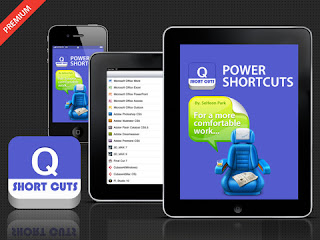
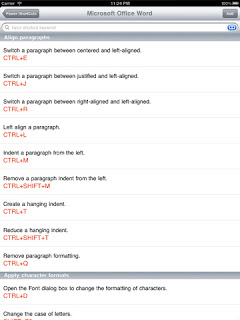
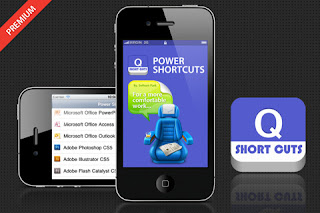
Power Shortcuts iPhone&iPad App (software shortcuts & hotkey perfect)

Price : $1.99
URL : http://itunes.apple.com/us/app/power-shortcuts/id455504411


※ Reason to recommend this program
1. Steady progress updates and each update increases the number of programs.
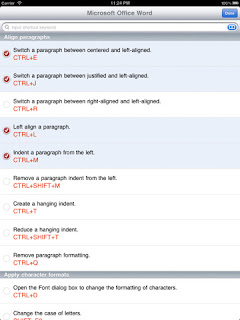
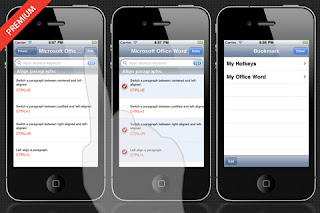
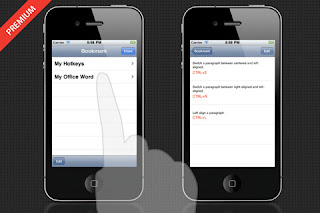
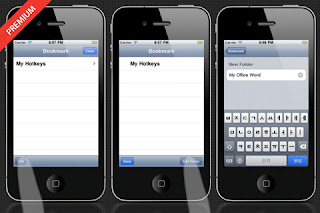
2. With bookmarks, you can create your own list of shortcuts.
3. Through the search box to find the shortcuts for each program can be viewed.
4. If you need a program shortcut to the Send bbakse@gmail.com

-----------------------------
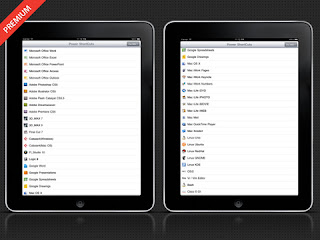
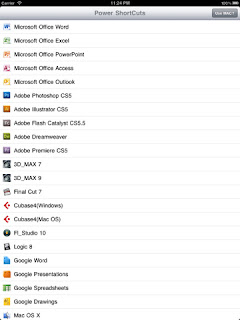
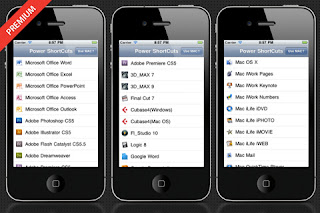
Currently the list of shortcuts
-----------------------------

Microsoft office Word
Microsoft office Excel
Microsoft office Powerpoint
Microsoft office Access
Microsoft office Outlook

Adobe Photoshop CS5
Adobe Illustrator CS5
Adobe Flash Catalyst CS5.5
Adobe Dreamweaver8 (only English)
Adobe Premiere CS5

Autodesk 3D Max Studio7 (only English)
Autodesk 3D Max Studio9 (only English)

Apple FinalCut (only English)
Cubase4(Windows) (only English)
Cubase4(Mac OS) (only English)
FL Studio10 (only English)
Apple Logic (only English)

Google Docs Word
Google Docs Presentations
Google Docs Spreadsheets (only English)
Google Docs Drawings (only English)

Apple Mac OS X (only English)
Apple iWork Pages (only English)
Apple iWork Keynote (only English)
Apple iWork Numbers (only English)
Apple iLife iDVD (only English)
Apple iLife iPHOTO (only English)
Apple iLife iMOVIE (only English)
Apple iLife iWEB (only English)
Apple Mail (only English)
Apple Quicktime Player (only English)
Apple Xcode4 (only English)

Linux-Unix (only English)
Linux Ubuntu (only English)
Linux RedHat (only English)
Linux GNOME (only English)
Linux KDE (only English)
OS/2 (only English)
Vi-Vim Edit (only English)
Linux Bash (only English)
Cisco E-DI (only English)


2011년 3월 11일 금요일

Balsamiq Mock Up

Mock up이란?
목적한 무엇을 만들기 전에 시험삼아 제작하는 시제품, 모형 정도로 인식된다.

누군가에겐 너무 기초적인 영단어라 저렇게 정리하는 것조차 웃기는 일이겠지만, 사실 영어에 약한 본인으로선 타 개발자들이 내뱉는 처음듣는 영어단어는 마치 전문용어 못지않은 장벽이 느껴진다. ㅡ,.ㅡ;;

아무튼 본론으로 넘어가서...
게임 디자인에 있어서 빼놓을 수없는 GUI!
상당수의 기획자들이 이 GUI를 디자인할 때 애용하는 툴은 아마도 MS오피스군 내의 파워포인트, 비지오 정도가 아닐까 싶다.
본인도 바로 엊그제까지만해도 파워포인트를 애용해왔으며, 크게 불편함을 느끼지 않았다.

하지만, 지난주에 회사동료 개발자로부터 한가지 툴을 소개받았으니...
그게 바로 지금 소개할 Balsamiq Mockups 이다.

기존 방식에 딱히 불편함을 느끼지 못한 분들이 "기존 방식을 버려도 좋을만큼 괜찮은거냐?" 라고 한번에 정곡을 콕 찝어 물어본다면 주저없이 "그렇다!"라고 대답할 수있다.

이유는 간단하다.
이 툴은 UI 디자인에 최적화되어있다. (게임, 웹등의 UI 및 스토리보드 디자인)

오피스군의 파워포인트나 비지오는 그 기능의 방대함에선 절대 우위에 있으나, UI 제작에 최적화되어있는 툴은 아니다.
본인은 특정 UI를 디자인하기 위해 매번 버튼이나 리스트, 기타 여러 UI 컴포넌트들을 새로 제작해왔다.
서로 다른 UI의 경우 각각 필요한 컴포넌트들이 다를 수 있어 새로 제작해야만 할 수도 있으나, 사실 거의 비슷한 역할의 UI라도 미세한 차이가 발생하면 뭔가 내 의도가 다른 개발자들에게 제대로 전달되지 않을 것 같은 강박관념 같은 것이 작용한 결과일 것이다.
또한, 보는 입장에서 최대한 그럴싸하게 보이도록 하기 위해 본인의 전문 분야가 아님에도 불구하고 꾸미기 작업에 힘을 쏟는다.
이 과정을 거치는 도중에 사실상 상당히 불필요한 작업들에 할당되는 작업 시간이 제법 크게 잡히게 된다.

이 툴은 바로 위와 같은 불필요한 작업의 반복을 최소화하고, 적당히 이쁘고 빠르고 정확하게 자신의 의도를 전달할 수 있는 결과물을 산출해내기 위한 도구라고 할 수 있다.


대략 툴의 모습은 이와 같다. 뭔가 있어보이는가?
그렇다면 잘못본 것이다. 사실 툴 자체는 별거 없다. ㅡ,.ㅡ;
윈도의 기본적인 편집기능(복사, 자르기, 붙이기 등등)과 대부분의 UI에서 사용되는 컴포넌트들의 나열.
사용자는 제공되는 이 기능들만을 사용해서 자신이 원하는 어떠한 형태의 UI라도 디자인할 수 있다.

[사용 방법]
1. 맘에드는 컴포넌트를 Drag & Drop
2. 사이즈 조정 및 정렬
3. 컴포넌트 속성 편집
4. 1~3 반복

대부분의 인터페이스가 오피스군과 비슷하며, 한번보면 이게 뭐구나라는 것을 알기쉽게 직관적으로 보여주고 있으므로 걱정말고 그냥 써보면 된다.

그럼 한번 시험해보자.


본인이 최근 두달여간 열심히 플레이하고 있는 '마비노기 영웅전'의 거래소 UI이다.
요 화면을 Balsamiq Mockups로 옮겨보면 아래와 같다.


어떤가? 그럴싸한가?
위 UI 목업을 제작하는데 정확하게 20분 정도 소요되었다.
물론 이미 존재하는 UI를 그대로 옮겨놓았기 때문에 측정된 시간은 큰 의미가 없을 수도 있다.
하지만, 이것은 본인이 이 툴을 처음 사용하여 제작한 첫 결과물이라는 점. 툴이 아직 익숙치않아 제작 시간 중 상당 시간을 본인이 원하는 컴포넌트를 찾는 것에 허비했다는 것을 감안한다면 숙련된 이후의 기대효과는 더욱 커질 것으로 생각된다.

정리하면, 이 툴의 최대 장점은 이렇다.
UI 디자인에 있어 불필요한 실 제작 작업 시간을 최소화하여 정작 필요한 고민의 시간을 벌어준다.

Balsamiq Mockups를 받으려면 아래의 공식 사이트를 찾아가보자.
공식 사이트 : http://www.balsamiq.com

이 툴은 Adobe Air 기반으로 가동되므로, 사전에 Adobe Air를 설치해 두어야 한다.

[확장성]
Balsamiq은 XML 포맷으로 Export를 하여 Jira나 Wiki로 옮겨 등록할 수 있다.
본인이 몸담고 있는 회사에서도 최근 Jira를 사용하여 프로젝트 관리를 하게되어 다른 개발자들과의 공유가 손쉽게 이루어질 듯 하다.

[활용 Tip]
Adobe Air 기반의 어플리케이션은 대부분 한글 폰트를 지원하지 않는다.
하지만 이 툴의 경우 자신이 원하는 폰트를 사용할 수 있는 기능을 지원한다.
간단히 현재 윈도에서 사용하는 시스템 폰트를 사용하도록 해보자.
'메뉴의 View > Use System Fonts' 를 클릭하여 체크상태 유지

만약 시스템 폰트 이외에 원하는 폰트를 사용하고자 한다면 BalsamiqMockups.cfg 파일을 아래와 같이 수정하자.
<?xml version="1.0" encoding="UTF-8"?>
<config>
      <fontFace>Malgun Gothic</fontFace>
      <rememberWindowSize>false</rememberWindowSize>
      <useCookies>false</useCookies>
</config>

BalsamiqMockups.cfg 파일은 운영체제마다 위치가 다르니 아래의 경로를 따라가자.

Windows XP
C:\Documents and Settings\<username>\Application Data\BalsamiqMockupsForDesktop.#numbers#\Local Store
Windows Vista : C:\Users\<yourusername>\AppData\Roaming\BalsamiqMockupsForDesktop.#numbers#\Local Store

[라이센스]
Balsamiq Mockups는 기본적으로 7일간의 데모 기간을 제공한다.
7일 이후에도 계속 사용할 수는 있지만(잘 모르겠으나 아마 그런듯...) 몇몇 기능의 제약이 있다.
정식 라이센스를 받으려면 위 공식 사이트로 가서 $79의 가격을 지불해야 한다.

하지만, 아래의 경우 프리 라이센스를 받을 수 있다고 한다.

GET MOCKUPS FOR DESKTOP FOR FREE

You can download Mockups for Desktop for free. The application is fully functional for 7 days, but you'll need a key in order to save your work after the evaluation period is over. You can also try the Mockups editor on the web here.
We love donating our software to good people, we think it's a whole lot of WIN!
To apply for a free license key, you can do one of the following:
  • If your company bought Mockups for Confluence, JIRA, FogBugz or XWiki, ask your IT admin for your company's license information and use it FREE of charge.
  • If you are a do-gooder of any sort (non-profit, charity, open-source contributor, you get the idea), email us with a short blurb and we'll send you a license, FREE of charge.
  • If you are willing to demo Mockups to an audience of at least 15 professionals (at a team meeting, user group, a conference, a BarCamp),email us your info and we'll give you two licenses, one for you to keep and one to give away at the event, FREE of charge.
  • If you teach a high-school classemail us the name of your school and your class, plus the number of students in your class. We will send you a license for all of them.
  • If you are a usability professional, you might be interested in our Free Mockups for UX Training program.
  • A note to university students and professors: we currently do not offer free licenses to universities, but we'll be happy to offer you an additional 50% off any orders of 10 or more licenses. Let us know if you're interested and we'll set up a discount code for you.
If you don't fit in any of the five buckets above, you can use the demo on this site or the Desktop trial and use "Export..." to save your work manually. Or you can just buy a single-user license of Mockups for Desktop for $79 below.
IMPORTANT: due to the large volume of requests we have been receiving lately, we cannot promise we'll answer every email. We try our best, but please be understanding if you don't hear back from us.

2011년 1월 24일 월요일

google API search

  • 검색바를 하나 놓으시구 검색버튼이 눌렸을때

    NSString *source = [searchBar text];

    [searchBar resignFirstResponder];
    NSError *error = nil;
    NSStringEncoding encoding;
    NSString *url = [NSString stringWithFormat:@"http://maps.google.co.kr/maps/geo?q=%@&output=csv",
    [source stringByAddingPercentEscapesUsingEncoding:NSUTF8StringEncoding]];
    NSString *locationStr = [NSString stringWithContentsOfURL:[NSURL URLWithString:url]
    usedEncoding:&encoding
    error:&error];

  • NSArray *items = [locationStr componentsSeparatedByString:@","];
    CLLocationCoordinate2D mCoordinate;
    if ([items count] >= 4 && [[items objectAtIndex:0] isEqualToString:@"200"]) {
    mCoordinate.latitude = [[items objectAtIndex:2] doubleValue];
    mCoordinate.longitude = [[items objectAtIndex:3] doubleValue];
    }else{
    //검색 실패 일경우
    UIAlertView *view = [[UIAlertView alloc]
    initWithTitle:@"알림"
    message:@"검색어가 부정확 합니다"
    delegate:self
    cancelButtonTitle:@"닫기"
    otherButtonTitles:nil];
    [view show];
    [view release];
    }


  •  [self dropPinAnnotationByCoordinate:mCoordinate];

    위의 드랍핀어노태이션은 제가 만든 함수 이구요
    어노테이션을 놓으시려면 즉 핀을 위치에 지정하게 하시려면
    viewForAnnotation을 정의

www.bbakse.com OPEN!

http://www.bbakse.com/

2011년 1월 20일 목요일

objective c memory manage

+ 오브젝티브시(Objective-C) 메모리 관리 기본 설명
일단 아이폰 개발자의 유명한 카페 '맥부기' 카페를 가입하고 '문씨'라는 분의 메모리 강좌를 읽는다. 내가 서점가서 아이폰, 오브젝티브시 관련 서적을 몇권 읽어봤는데 이 분의 강좌보다 못한것 같다. (이분의 강좌로 설명 때웁니다. ^ ^;)


+ 오브젝티브시(Objective-C) 메모리 관리 기본규칙

1. 함수내에서 쓰는 객체들은 전부 오토릴리즈(autorelease)로 한다.
      1. alloc init 과 release무더기면 코드만 해맨다
2. 전역 변수는 지정할때 리테인카운트를 하나 올린고 안쓸때 해제한다.
      1. 계속 가지고 있을것이니 retain, 더이상 안쓸때는 release!
3. 전역 변수에 객체를 사용하다가 해제(release)를 하면 미련없이 nil처리 (변수 = nil;)하자
      1. release하고나면 반드시 변수 = nil; 해서 이후에 실수로 접근해도 문제없다.
4. 프로퍼티는 전역 변수가 아니다!
      1. self.title과 title, 헤깔리지 말자.
5. 다른 객체에 전달하는거, 알아서 하겠지. 신경쓰지 말자.
      1. NSMutableArray같은 관리 객체에 넣어둔거 해제될때 알아서 내용도 해제 시킨다.
6. retainCount함수로 일일이 확인해보지 말자 괜히 헤깔린다.
      1. 상황에 따라 예상보다 더 나오는 경우도 있습니다 그만큼 더 해제 시킨다고 해매지 마세요.
7. 내가 만든 함수도 객체를 돌려줄땐 오토릴리즈로 돌려주자
출처: 문씨의 메모리강좌(1) http://cafe.naver.com/mcbugi/71504

나는 위의 규칙을 명확히 이해하고 난 후 오브젝티브시의 메모리관리를 이해할 수 있었다. 함수내에서 쓰는 객체들은 무조건 autorelease~! 이것만 명심해도 많은 메모리 관리 고민이 해결되었다.

+ 오브젝티브시(Objective-C) 메모리 관리에 도움되는 두가지 툴
1. 인스트루먼트(Instrument)
x-code를 쓰다보면 메인 에디터툴 말고 유용한 도구가 많이 있는데, 인스트루먼트는 메모리 누수를 체크해주고 기타 여러가지 메모리 관리를 모니터링 해준다. 인스트루먼트를 실행하면 Record 가 되면서 어플이 실행되는데 어플의 이런저런 기능을 실행하다가 누수가 발생되면 빨간 그래프로 누수 현황을 알려준다. 그림 섞은 자세한 설명은 다음 기회에..

2. Build And Analyze 기능 사용
x-code의 신기한 기능중 하나인데 x-code에서 Build > Build And Analyze 를 실행하면 메모리 누수 흐름을 화살표로 보여준다. 그래서 어디를 고쳐야 메모리 누수가 없겠구나 라는것을 짐작할 수 있다. 그림 섞인 자세한 설명은 일단 카페 검색으로..^ ^;

+ 결론
사실 메모리 관리 개념 자체가 없었던 자바 개발자로 처음 Objective-C 쓸때는, 마치 자동차의 수동변속기 다루는 것처럼 어려워했고 무서워하기도 했다. 그러나 위의 메모리 관리 이론을 알고, 메모리 관리 규칙을 알고, 메모리 관리에 도움되는 두가지 툴을 알았더니 전혀 무서울게 없었다. 오히려 메모리 관리를 내가 직접하니 뿌듯했고, 프로그램도 더 효율적으로 거듭나는것 같았다.

덧) "Apple에서 제공하는 동영상을 보고 있는데, 지금은 Optimizing 쪽을 보고 있습니다.
autorelease에 대한 내용이 있었는데, 가능하면 사용하지 말라고 하네요.
10배의 속도 차이가 있다고 합니다.편한만큼 내놓아야하는게 있나봅니다." <- 어느분의 정보?인데..이 의견이 사실인가요~? ^ ^;

2010년 12월 29일 수요일

Iphone Icon Size

Heres the images you need to make to support all current devices
  • iTunesArtwork – Icon for iTunes AdHoc distribution (512×512)
  • icon@2x.png – Home screen icon for iPhone 4 (114×114)
  • icon-72.png – Home screen icon for iPad (72×72)
  • icon-Small@2x.png – Settings/Spotlight icon for iPhone 4 (58×58)
  • icon.png – Home screen icon for iPhone 3 (57×57)
  • icon-Small-50.png – Spotlight icon for iPad (50×50)
  • icon-Small.png - Settings/Spotlight icon for iPhone 3 (29×29)

iAd & AdMob feature ADD

AdViewController.h

#import <UIKit/UIKit.h>
#import <iAd/iAd.h>
#import "AdMobDelegateProtocol.h"

@protocol AdViewControllerDelegate;

@interface AdViewController : UIViewController <ADBannerViewDelegate, AdMobDelegate>
{
 id <AdViewControllerDelegate> delegate;
 id adBannerView;

 AdMobView* adMobAd;
}

@property (nonatomic, assign) id <AdViewControllerDelegate> delegate;

- (id)initWithMasterView:(UIView*)masterView;
- (void)rotateBannerView:(UIDeviceOrientation)toDeviceOrientation;

@end

@protocol AdViewControllerDelegate

- (void)adController:(AdViewController*)controller didLoadiAd:(id)iadBanner;
- (void)adController:(AdViewController*)controller didFailedToRecieveiAd:(id)iadBanner;

- (void)adController:(AdViewController*)controller didLoadAdMobAd:(AdMobView*)adMobBanner;
- (void)adController:(AdViewController*)controller didFailedToRecieveAdMobAd:(AdMobView*)adMobBanner;

@end


AdViewController.m
#import "AdViewController.h"
#import "cocos2d.h"

#import "AdMobView.h"

@implementation AdViewController

@synthesize delegate;

- (UIDeviceOrientation)currentOrientation
{
 return [[CCDirector sharedDirector] deviceOrientation];
}

- (id) initWithMasterView:(UIView*) masterView
{
 if( nil != (self = [super init]) )
 {
  [self setView:masterView];

  //Initialize the class manually to make it compatible with iOS < 4.0
  Class classAdBannerView = NSClassFromString(@"ADBannerView");
  if (classAdBannerView != nil)
  {
   adBannerView = [[classAdBannerView alloc] initWithFrame:CGRectZero];
   [adBannerView setDelegate:self];
   [adBannerView setRequiredContentSizeIdentifiers: [NSSet setWithObjects:
                 ADBannerContentSizeIdentifier320x50,
                 ADBannerContentSizeIdentifier480x32, nil]];

   [self.view addSubview:adBannerView];

   [self rotateBannerView:[self currentOrientation]];

   [adBannerView setHidden:YES];

  }
  else
  {
   //Request an AdMob Ad
   adMobAd = [AdMobView requestAdOfSize:ADMOB_SIZE_320x48 withDelegate:self];
   [adMobAd retain];
  }
 }

 return self;
}

- (void)rotateBannerView:(UIDeviceOrientation)toDeviceOrientation
{
 if (adBannerView)
 {
  if (UIDeviceOrientationIsLandscape(toDeviceOrientation))
   [adBannerView setCurrentContentSizeIdentifier:ADBannerContentSizeIdentifier480x32];
  else
   [adBannerView setCurrentContentSizeIdentifier:ADBannerContentSizeIdentifier320x50];

  [(UIView*)adBannerView setTransform:CGAffineTransformIdentity];

  //Set the transformation for each orientation
  switch (toDeviceOrientation)
  {
   case UIDeviceOrientationPortrait:
   {
    [(UIView*)adBannerView setCenter:CGPointMake(160, 455)];
   }
    break;
   case UIDeviceOrientationPortraitUpsideDown:
   {
    [(UIView*)adBannerView setTransform:CGAffineTransformMakeRotation(CC_DEGREES_TO_RADIANS(180))];
    [adBannerView setCenter:CGPointMake(160, 25)];
   }
    break;
   case UIDeviceOrientationLandscapeLeft:
   {
    [(UIView*)adBannerView setTransform:CGAffineTransformMakeRotation(CC_DEGREES_TO_RADIANS(90))];
    [adBannerView setCenter:CGPointMake(16, 240)];
   }
    break;
   case UIDeviceOrientationLandscapeRight:
   {
    [(UIView*)adBannerView setTransform:CGAffineTransformMakeRotation(CC_DEGREES_TO_RADIANS(-90))];
    [adBannerView setCenter:CGPointMake(304, 240)];
   }
    break;
   default:
    break;
  }
 }

 if (adMobAd)
 {
  [adMobAd setTransform:CGAffineTransformIdentity];

  //Set the transformation for each orientation
  switch (toDeviceOrientation)
  {
   case UIDeviceOrientationPortrait:
   {
    [adMobAd setCenter:CGPointMake(160, 456)];
   }
    break;
   case UIDeviceOrientationPortraitUpsideDown:
   {
    [adMobAd setTransform:CGAffineTransformMakeRotation(CC_DEGREES_TO_RADIANS(180))];
    [adMobAd setCenter:CGPointMake(160, 24)];
   }
    break;
   case UIDeviceOrientationLandscapeLeft:
   {
    [adMobAd setTransform:CGAffineTransformMakeRotation(CC_DEGREES_TO_RADIANS(90))];
    [adMobAd setCenter:CGPointMake(24, 240)];
   }
    break;
   case UIDeviceOrientationLandscapeRight:
   {
    [adMobAd setTransform:CGAffineTransformMakeRotation(CC_DEGREES_TO_RADIANS(-90))];
    [adMobAd setCenter:CGPointMake(296, 240)];
   }
    break;
   default:
    break;
  }
 }
}

#pragma mark -
#pragma mark ADBannerViewDelegate

- (BOOL)allowActionToRun
{
 return YES;
}

- (void) stopActionsForAd
{
 //Pause background music here

 [adBannerView setHidden:YES];

 [[CCDirector sharedDirector] stopAnimation];
 [[CCDirector sharedDirector] pause];
}

- (void) startActionsForAd
{
 //Resume background music here

 [self rotateBannerView:[self currentOrientation]];
 [[UIApplication sharedApplication] setStatusBarOrientation:(UIInterfaceOrientation)[self currentOrientation]];
 [adBannerView setHidden:NO];

 [[CCDirector sharedDirector] stopAnimation];
 [[CCDirector sharedDirector] resume];
 [[CCDirector sharedDirector] startAnimation];
}

- (BOOL)bannerViewActionShouldBegin:(ADBannerView *)banner willLeaveApplication:(BOOL)willLeave
{
 BOOL shouldExecuteAction = [self allowActionToRun];
    if (!willLeave && shouldExecuteAction)
    {
  [self stopActionsForAd];
    }
    return shouldExecuteAction;
}

- (void)bannerViewDidLoadAd:(ADBannerView *)banner
{
 [adBannerView setHidden:NO];
 [delegate adController:self didLoadiAd:banner];
}

- (void)bannerView:(ADBannerView *)banner didFailToReceiveAdWithError:(NSError *)error
{
 [adBannerView setHidden:YES];
 [delegate adController:self didFailedToRecieveiAd:banner];
}

- (void)bannerViewActionDidFinish:(ADBannerView *)banner
{
 [self startActionsForAd];
}

#pragma mark -
#pragma mark AdMobDelegate methods

- (NSString *)publisherIdForAd:(AdMobView *)adView
{
 return @"your_admob_publisher_id";    //replace it with you publisher id
}

- (UIViewController *)currentViewControllerForAd:(AdMobView *)adView {
 return self;
}

- (UIColor *)adBackgroundColorForAd:(AdMobView *)adView
{
 return [UIColor colorWithRed:0 green:0 blue:0 alpha:1]; // this should be prefilled; if not, provide a UIColor
}

- (UIColor *)primaryTextColorForAd:(AdMobView *)adView
{
 return [UIColor colorWithRed:1 green:1 blue:1 alpha:1]; // this should be prefilled; if not, provide a UIColor
}

- (UIColor *)secondaryTextColorForAd:(AdMobView *)adView
{
 return [UIColor colorWithRed:1 green:1 blue:1 alpha:1]; // this should be prefilled; if not, provide a UIColor
}

- (NSArray *)testDevices
{
 return [NSArray arrayWithObjects: ADMOB_SIMULATOR_ID, nil];
}

- (void)didReceiveAd:(AdMobView *)adView
{
 CCLOG(@"AdMob: Did receive ad");

 [self rotateBannerView:[self currentOrientation]];
 [self.view addSubview:adMobAd];

 [delegate adController:self didLoadAdMobAd:adView];
}

// Sent when an ad request failed to load an ad
- (void)didFailToReceiveAd:(AdMobView *)adView
{
 CCLOG(@"AdMob: Did fail to receive ad");
 [adMobAd removeFromSuperview];
 [adMobAd release];
 adMobAd = nil;

 [delegate adController:self didFailedToRecieveAdMobAd:adView];
}

#pragma mark -
#pragma mark Memory Management

- (void) dealloc
{
 if (adMobAd)
 {
  [adMobAd setDelegate:nil];
  [adMobAd removeFromSuperview];
  [adMobAd release];
  adMobAd = nil;
 }

 if (adBannerView)
 {
  [adBannerView setDelegate:nil];
  [adBannerView removeFromSuperview];
  [adBannerView release];
  adBannerView = nil;
 }

    [super dealloc];
}

@end


The usage is very simple, #import AdViewController.h in you Layer's .h and add the delegate protocol AdViewControllerDelegate

#import "AdViewController.h"

@interface Menu : CCLayer <AdViewControllerDelegate>
{
 AdViewController *adController;
}


And in your layer's .m add this

- (void)onEnter
{
 [super onEnter];

 adController = [[AdViewController alloc] initWithMasterView:[[CCDirector sharedDirector] openGLView]];
 [adController setDelegate:self];

}

- (void)onExit
{
 //Completely remove the controller
 [adController setDelegate:nil];
 [adController release];
 adController = nil;

 [super onExit];
}

- (void)adController:(AdViewController*)controller didLoadiAd:(id)iadBanner;
{
 //Do something when the ad loads, like moving objects.
}

- (void)adController:(AdViewController*)controller didFailedToRecieveiAd:(id)iadBanner;
{
 //Do something when the ad fails to load, like moving objects.;
}

- (void)adController:(AdViewController*)controller didLoadAdMobAd:(AdMobView*)adMobBanner;
{
 //Do something when the ad loads, like moving objects.
}

- (void)adController:(AdViewController*)controller didFailedToRecieveAdMobAd:(AdMobView*)adMobBanner;
{
 //Do something when the ad fails to load, like moving objects.
}